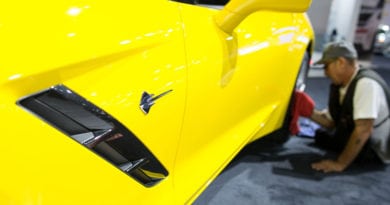
Getting Your Car Ready for a Car Show (detailing)
I’m going to admit I’m relatively new to “Showing My Car” at a car show. I mean, I have yet to enter any type of “Judged” show because while my Corvette looks good, I’m well aware it is far from a “Trophy Winner.” I’m more of a “Cruise-In” kind of guy and I like looking at and sharing the love of all the vehicles in attendance.
That does not mean that my Car is not cleaned and/or prepped before a Car Show. The Vette is kept pretty clean (By my Daily Driver Standards) so hence, I don’t necessarily have to work too hard. But to prepare for my first ever showing I surfed all over the internet looking for advice and ideas to get my car to look the best I could.
Start with the Dirtiest Items and Areas First
When beginning a detailing regimen, my experience and even advice I have seen say it’s always a good idea to start with the engine and engine compartment. And then do the wheels and tires.
By starting with the Engine Compartment, you will ensure that any dirt and grease that lands on the vehicle during engine compartment cleaning will be washed off during the initial rinsing and car washing. Depending on how big your hood opening is, and how much fender area is exposed, when washing the engine compartment it’s a good idea to cover the fender tops with towels to protect them from any harsh degreasers you may use.
Now, I should not have to say this but – Be advised that newer cars are very sensitive (My 95 Vette is the extreme case of this.) to lots of water in the engine compartment. So be sure to cover sensitive electronics and limit the amount of water to the bare minimum required to rinse off any engine degreaser you may use. Then go over smooth surfaces with a microfiber towel.
Then after you shut the hood you can move to the wheels and tires, Again My experience is that if you wash your wheels and tires first, you are preventing contamination from cleaners, brake dust, and/or dirt from being spattered back onto the body around the wheel opening areas as you rinse.
Washing the Car
Now, if you have not really washed your car in a long while take a moment to hit You-Tube and watch ChrisFix’s video on “Super Washing” your Car. Hands down it’s one of the best videos I have seen that give a very detailed version of an extreme wash of a car that then get’s it super clean.
Common wisdom amongst experts will tell you that washing, just like waxing, should be performed in the shade if at all possible. The reason is that a hot surface causes both wash and rinse water to evaporate quickly, causing spots and streaks.
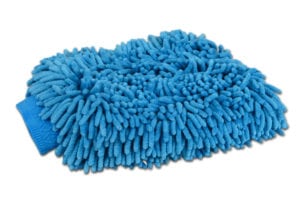
The first step in any wash job is to spray the vehicle with a medium to a light spray of water. This serves to rinse the large dirt and grime particles off of the finish before you hit it with a sponge or wash mitt (I prefer a wash mitt like this.) and grind those contaminants into the paint finish. Unless you are “super washing,” Always use soap that’s specifically made for car washing. Dishwashing detergent is not the way to go (unless you want to remove the layer of Wax to start fresh) as it’s much too strong and contains no surface conditioners or natural oils that aid in rinsing dirt and grit off the surface without scratching the finish.
Whether you prefer a natural sea sponge, a synthetic sponge, or a wash mitt of some sort, always make sure they’ve been thoroughly rinsed before use. The last thing you want to do is rub your finish with a sponge or mitt that’s contaminated with grit from a previous wash job. Never touch the bottom of your bucket while rinsing your Sponge, or Mitt, as you will invariably re-introduce dirt and contaminants that may scratch your clear coat and/or enamel.
Common sense is to always start washing and rinsing from the top down. If you’re using a car wash shampoo that contains natural oils, remember to rinse frequently and well so those oils aren’t allowed to dry on the car causing hazing.
Before rinsing I like to open all the doors, and Trunk, and wash those areas on the doors that nobody ever looks at until it’s too late. There is nothing worse than seeing a beautifully cleaned car, only to open the door and look at the dirty sill plates and pillars. SO do not forget those areas.
It’s a good idea for your final rinse to be done with a light spray or without the use of a spray nozzle; let the rinse water flow freely and sheet off the finish.
Drying the Car
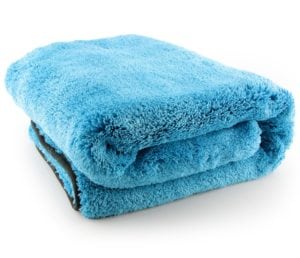
After the car has been thoroughly washed and rinsed its then time to dry it off in preparation for a good wax job. Some prefer to use a natural chamois for this chore while others opt for synthetic versions or Microfiber towels instead. Microfiber products are extremely soft and like a chamois will absorb over seven times its weight in water. I truly prefer using the microfiber version as it may be a psychological thing, it just seems like it is less likely to scratch the clear coat during this process
Just like washing start from the top and work your way down. I like to do roof, hood, then trunk, side windows and then work my way from front to back.
To Clay Bar or Not to Clay Bar?
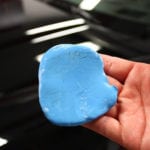
If you are following the Advice of Chrisfix for a “Super Wash” and/or this is your “first in a long time wash” and/or you intend to polish and wax rather than just wax, then I advise using a clay bar. A good going over with a clay bar is the perfect next step after a thorough wash job. Created to lift the particulate debris and contaminants that washing can’t, clay bars remove embedded grains of metal, tree sap, airborne environmental deposits, and paint overspray from your car’s finish by grabbing onto them and lifting them off a vehicle’s painted surface. This is a much more preferable way to refresh a finish than buffing with compound, and in many cases just as successful.
Always use the supplied lubricant with a clay bar product. When used as directed there is no polishing effect on the surface while the bar is grabbing the contaminants. As the bar becomes soiled, just pull, stretch and fold it to expose a fresh surface, and never reuse a clay bar that’s been dropped on the ground.
Polishing and Waxing.
I’m a firm believer that polishing your car should be done only when swirls and scratches in the clear coat and or enamel are showing. Remember: Waxes seal the surface and protect the paint from environmental elements. Polishes clean paint using an abrasive thus restoring gloss and depth. In many of today’s products, companies will combine polishes and waxes to enable the product to clean and protect the paint in one easy step.
Once again, when waxing, always work in a shaded area. High surface temperatures will cause waxes to dry too fast causing hazing and streaking.
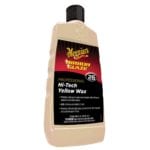
Whether you use a paste or a liquid, apply the wax in as thin a coating as possible, and try using one of those Microfiber towel products as a final wipe. I like to use Maguire’s Yellow Liquid Wax Available at Harbor Freight. I apply With Harbor Freight’s Cheapo Palm Polisher and remove with a microfiber working in no more than a 3-4 foot section of paint. – Like me, you’ll be amazed at the result.
A quick tip on your microfiber towels: Always store your polishing towels, wax applicators, chamois, etc. in plastic bags to ensure they stay clean and uncontaminated. I like to wash mine every month (Be sure to wash separately from your laundry or your wife will be pissed…Ask me how I know….. Trust me on this……)
Interior Cleaning.
So you spent all this time washing the outside it’s time to focus on the inside Start with a good vacuuming. I have shop Vac. I use the brush on all surfaces including the carpets unless it’s the first vacuuming after a harsh winter then I will use one of the stiff attachments to work the fibers of the carpets to loosen the heavy sand and particulates. This will often kick up dust and that is why I tend to do it first before washing any surfaces.
I like to use an old clean paint brush and I clean the vents while holding the Vacuum near it to suck in the dust that is loosened. For tough dust, I may use a compressed air nozzle to loosen it.
Choose a cleaner that is appropriate for whatever surfaces you are dealing with. Vinyl and Leather and Plastic surfaces are not all created equal so it up to you to decide which product to use. Plastic naturally creates static and thus attracts dust and particulates. Avoid common household detergents as they will dull the plastic. I’m not a big fan of Armor All as I find it to evaporate and become a milky coating on my windshield that is worse than if I was a smoker.
 For tough spots on the carpets or fabric upholstery, my Dad always turned to “Tough Stuff” and hence, I do as well… I will usually treat the spot first using a bristle brush, and then do an overall clean and wipe with a terry cloth towel. Allow to dry.
Apply appropriate protectants and dressings. My final step is to wash both inside and outside of the windows.
The final bit of detailing in the process should be the interior glass. For best results use an automotive glass cleaner versus a household ammonia-based one. Household glass cleaner is not formulated to remove vinyl fog etc. like the automotive version is.
Final Tips and/or Thoughts
- Quick detail products are a great way to maintain that just waxed look between actual wax jobs. They’re easy to use, look great, but don’t last like a real wax job.
- Get a California Duster. ‘Nuff Said.
- Always use a dedicated sponge or wash mitt for use on your tires, and never use them on your cars finish.
- After cleaning your tires, let them dry completely (at least 30 minutes) before applying a dressing. It’s also a good idea to use applicators that are made specifically for this type of job–it makes a rather messy chore that much easier.
- One of the easiest ways to polish those fancy chromed or billet wheels of yours is with one of those Mother’s Power Balls–they really are awesome, use one once and you’ll never go back to doing it by hand.
- If necessary Mildew bacteria can be killed and cleaned by using a medium/soft brush and a 4 to 1 mixture of water and ammonia; then rinse with cool water.
Did we miss anything? Have any suggestions? Comment below.


Leave a Reply